


Book Expert Service
Discover What Signs Indicate Heat Pump Underperformance
Is your heat pump underperforming? Learn key signs of inefficiency post-installation and take steps toward improved energy efficiency and comfort in your home.

Key Signs Your Heat Pump Is Underperforming After Installation: What to Watch For
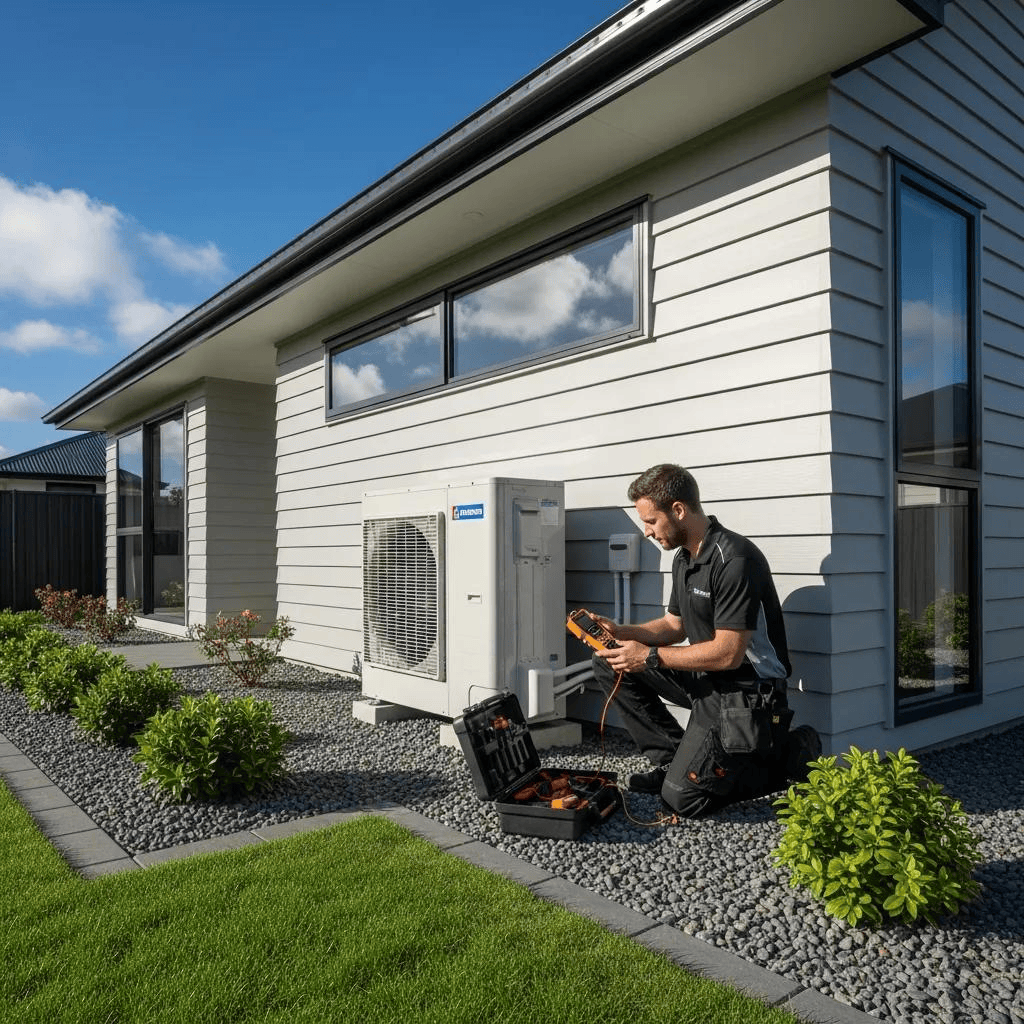
A newly installed heat pump that fails to meet expectations creates immediate frustration and hidden costs; underperforming after installation means the system is delivering less comfort, using more energy, or cycling in ways that shorten equipment life. This article explains how to recognize seven practical signs that a heat pump is underperforming after installation and what each sign typically indicates about system commissioning, airflow, refrigerant, or electrical issues. You will learn clear DIY checks to perform safely, what symptoms require a professional diagnostic, and how local factors in Tampa, FL climate can change expected behavior. The guide walks through ineffective heating/cooling, short cycling, odd noises and smells, outdoor unit icing, high energy bills, and failure to start, with a focus on actionable steps and escalation boundaries. Each H2 section includes concise symptoms, diagnostic steps, a short checklist or table for rapid assessment, and recommended next steps so you can document evidence before calling a technician. Throughout, we reference practical homeowner checks and when a professional visit is the correct next move, using common diagnostic language like refrigerant charge, reversing valve, defrost control, and airflow restrictions.
Why Is My New Heat Pump Not Heating or Cooling Effectively?
A new heat pump that does not heat or cool effectively typically suffers from commissioning errors, airflow restrictions, or control misconfiguration that limit heat transfer or distribution. Incorrect refrigerant charge, improper unit sizing, reversed reversing valve setup, or thermostat calibration errors reduce capacity and comfort, while blocked filters or duct leaks degrade distribution. Effective homeowner checks include verifying thermostat mode and setpoint, inspecting and replacing filters, and ensuring supply vents are open and unobstructed; these quick checks often identify obvious airflow problems before escalating. When basic checks don’t restore performance, the likely culprits require diagnostic tools and licensed intervention to measure refrigerant pressures, verify compressor operation, and confirm reversing valve orientation. The following section explains the most common installation-related causes and how to evaluate urgency.
What Causes Heat Pump Heating and Cooling Failures After Installation?
Several installation-stage mistakes cause immediate underperformance, with clear component links that inform repair priority. An incorrect refrigerant charge—either overcharged or undercharged—reduces heat exchange efficiency and can show as reduced capacity or long run times, while oversized units short-cycle and underperform at maintaining steady temperature. Ductwork that is undersized, disconnected, or leaky can drop delivered airflow and create hot or cold rooms, and thermostat wiring errors or misconfigured thermostats can command the wrong mode or read misleading temperatures. Local climate factors around Tampa, FL—mild winters and coastal humidity—mean proper sizing and defrost sequencing are important to avoid marginal comfort in cooler nights. Recognizing which cause applies helps prioritize checks: airflow and thermostat checks are homeowner-safe, while refrigerant and reversing valve issues need a certified diagnostic.
Installation Faults Impacting Heat Pump Performance
The performance of heat pump systems can be significantly affected by installation faults. This paper investigates the impact of different installation faults on a heat pump’s seasonal performance, highlighting the importance of proper commissioning and setup.
Sensitivity analysis of installation faults on heat pump performance, PA Domanski, 2014
How Can I Troubleshoot Ineffective Heating or Cooling at Home?
Start with safe, repeatable checks that document symptoms before contacting a pro: confirm thermostat is set to heat or cool and the setpoint is at least 2–3°F from room temperature, replace or clean the air filter, and ensure return and supply grilles are open and unobstructed. Next, perform a simple airflow check at multiple vents—if some rooms have weak flow, record which vents and times, as this hints at duct or blower problems. Observe outdoor unit behavior: listen for steady compressor operation and watch for refrigerant-like hissing; note run times and whether the unit cycles quickly or runs continuously. If temperature delta across supply and return is low, or you detect refrigerant odor or visible oil, stop DIY steps and schedule a professional diagnostic focused on refrigerant charge, reversing valve, and blower calibration.
Different root causes map to observable symptoms and quick checks:
This comparison helps you document what you observed and what you checked before a technician visit, which speeds diagnosis and narrows possible commissioning errors. If these checks don’t resolve the issue, a certified technician should measure pressures, temperatures, and control sequencing.
Why Is My Heat Pump Short Cycling After Installation?
Short cycling is when the heat pump repeatedly turns on and off in short bursts, typically under ten minutes per cycle, and it significantly increases wear and energy use. Short cycling commonly stems from incorrect sizing (an oversized unit reaches setpoint almost immediately), improper refrigerant charge that prevents stable heat transfer, thermostat placement near a heat source or return air path, or electrical/control faults such as stuck contactors. The immediate risks include compressor start-stop stress, reduced efficiency, and potential premature failure; long-term, warranty issues can arise if a pattern of short cycling goes unattended. Quick homeowner checks include ensuring thermostat is not near a heat source or return vent, replacing a dirty filter, and confirming setpoint isn’t forcing rapid on/off. When those checks don’t stop short cycling, professional commissioning and electrical diagnostics are usually required.
What Installation Errors Lead to Heat Pump Short Cycling?
Several specific installation errors cause short cycling: oversizing the unit means it meets thermostat demand too rapidly and then shuts off, creating frequent starts that stress the compressor. Improper refrigerant charge can create unstable pressure-temperature conditions that allow the system to reach false setpoints or trip protective devices. Thermostat wiring mistakes, such as incorrect anticipator or sensor connections, will cause the control to react to incorrect signals, triggering rapid cycling. Each error has a different fix—resizing requires replacement or staged control, refrigerant issues require pressure-based adjustment and leak repair, and wiring faults need systematic electrical correction by a qualified installer.
Detecting Refrigerant Charge Faults in Heat Pumps
In heat pumps, refrigerant leakage is one of the frequent faults. This leads to a decrease in the system's performance and efficiency. Therefore, it is essential to predict refrigerant charge amount. Hence, the refrigerant charge fault detection (RCFD) methods are crucial for maintaining optimal heat pump operation.
Refrigerant charge fault detection method of air source heat pump system using convolutional neural network for energy saving, JW Yoo, 2019
Why Is There Ice Buildup on My Heat Pump’s Outdoor Unit After Installation?
Ice on the outdoor unit after installation arises when coil temperature drops below freezing because of defrost control problems, low refrigerant, or restricted airflow that prevents heat exchange; each cause requires different levels of intervention. A correctly functioning defrost cycle periodically reverses the refrigerant flow or uses electric defrost to shed frost; if defrost timers or sensors were mis-set during commissioning, frost can accumulate rather than being cleared. Low refrigerant reduces pressure and evaporator temperature, causing persistent frost patterns, while blocked outdoor airflow, clogged filters, or restricted indoor airflow reduce system heat absorption and lead to freezing. Homeowners should avoid chipping ice and instead document frost patterns, runtime behavior, and any error codes before calling a technician.
How Do Defrost Cycle Malfunctions Cause Ice Formation?
Defrost control logic coordinates when the outdoor coil is heated to remove frost; if timers, sensors, or control modules are mis-set during installation, the unit may not enter defrost at the correct intervals or durations. For example, a reversed reversing valve connection or incorrect defrost thermostat reading prevents heat flow reversal, so frost accumulates despite normal outdoor conditions. Observing whether the outdoor fan stops and whether hot refrigerant is present during defrost cycles helps identify control failure; these checks involve temperature readings and control verification that a homeowner should not attempt without tools. Professional calibration of defrost timers, sensors, or replacement of a faulty control board typically resolves persistent icing.
Can Low Refrigerant or Airflow Issues Lead to Frozen Coils?
Yes—low refrigerant reduces evaporative pressure and coil temperature, producing frost that spreads across the coil surface in patterns different from defrost faults, whereas airflow restrictions make the coil too cold by starving it of warm return air. Symptoms differ: a refrigerant leak often yields oily residue and steady frost even during long run times, whereas airflow issues typically show reduced supply temperatures and uneven room comfort. Home checks include inspecting filters and vents and noting whether indoor airflow is weak; if airflow is adequate but freezing persists, a leak test and refrigerant recharge performed by a certified technician are needed to safely restore correct charge and root out underlying faults.
Impact of Refrigerant Charge on Heat Pump Performance
For the test of an R-410A split heat pump unit, the refrigerant charge was varied from about 70% to 130% of the manufacturer's recommended charge. The results show that the system's cooling and heating capacities, as well as its energy efficiency, are sensitive to the refrigerant charge.
Evaluation of the impacts of refrigerant charge on air conditioner and heat pump performance, JE Braun, 2012
Below is a diagnostic mapping to guide escalation decisions.
What Causes Unexpectedly High Energy Bills After Heat Pump Installation?
High energy bills after a new heat pump installation often point to installation mistakes, control sequencing errors that drive auxiliary heat, or building envelope issues that increase load; each driver affects energy use differently. Common installation-related contributors include incorrect refrigerant charge that lowers COP, poor duct sealing that leaks conditioned air, and misconfigured control logic that allows electric auxiliary heat to run unnecessarily. Thermostat programming errors and short cycling compound these effects, while weak insulation or air leaks in the home force the heat pump to run longer. A combination of system audit and home energy checks helps isolate whether a technician adjustment or envelope improvement yields the best savings.
How Do Installation Mistakes Affect Heat Pump Energy Use?
Installation mistakes produce measurable energy impacts: an undercharged refrigerant system can lower efficiency by double-digit percent ranges versus properly charged systems, leaking ducts can waste 10–30% of conditioned air depending on severity, and miswired controls can cause auxiliary resistance heat to run and multiply energy costs. Professional commissioning that measures superheat/subcooling, checks blower curves, and verifies control sequencing typically restores design efficiency. Homeowners can prepare for an audit by collecting recent utility bills, noting runtime patterns, and documenting comfort complaints to help technicians correlate performance to energy use.
Why Is My Heat Pump Not Turning On or Responding After Installation?
Failure to start after installation usually implicates electrical supply, control wiring, or component-level failures such as blown fuses, tripped breakers, failed contactors, or defective capacitors and control boards. Initial safe homeowner checks include verifying that circuit breakers and outdoor disconnects are closed and that the thermostat has power and correct mode; replacing thermostat batteries and ensuring simple control settings are correct often resolves basic no-start reports. If breakers immediately trip or the outdoor unit hums but doesn’t start, that points to component failure—capacitor or contactor issues—that require professional electrical diagnostics and repair. Proper documentation of what you observed (breaker state, humming, error codes on the thermostat) helps technicians quickly narrow root causes.
What Electrical Problems Prevent Heat Pump Startup?
Several electrical failures keep a heat pump from powering up: a tripped breaker or blown fuse cuts supply and is the simplest fix, while a failed contactor or start capacitor will allow the compressor to hum but not spin, indicating a component replacement is necessary. Poor wiring connections left from installation can cause intermittent failures or overheating, and a faulty control board or safety interlock can prevent the system from energizing even when power is present. For safety, homeowners should avoid probing internal components and instead record symptoms—breaker state, any humming, visible error indicators—before calling a licensed electrician or HVAC technician.
How Do Thermostat and Component Failures Affect Heat Pump Activation?
Thermostat faults or misconfiguration prevent proper communication and can leave a heat pump unresponsive; incorrect thermostat wiring, wrong anticipator settings, or incompatible thermostats block the control signal needed to energize the outdoor unit. Component-level failures—failed sensors, relay sticking, or damaged control boards—can sever startup sequences even with correct thermostat commands. Stepwise verification helps: confirm thermostat mode and wiring terminal consistency, then check for visible fault codes; when control-level faults are suspected, a certified technician should conduct voltage checks and replace defective modules to restore reliable activation. For persistent or hazardous electrical symptoms, immediate professional intervention is essential.
Service and professional escalation: if safe checks fail to restore operation or if electrical odors, tripped breakers, or humming without startup are present, contact an experienced local service provider. Sunstate Mechanical Contractors, Inc offers diagnostic visits and repair services with NATE-certified technicians who can perform electrical diagnostics, replace failing components, and verify commissioning to ensure safe, reliable startup. To request a diagnostic visit or a quote for repair, document your observations, recent utility behavior, and any visible error codes to help the technician prepare for an efficient onsite assessment; scheduling an audit often identifies both immediate fixes and efficiency opportunities that reduce long-term costs. For homeowners considering broader energy improvements, their combined HVAC and solar approach can be discussed during the diagnostic to explore longer-term energy savings.
- Immediate homeowner checks: Verify breaker, thermostat mode, and visible wiring; document symptoms.
- When to call a professional: If breakers trip, you smell burning, the unit hums but won’t start, or safe checks don’t restore operation.
- What the technician will do: Perform voltage and component-level testing, replace capacitors or contactors, and verify control sequences and commissioning.
These steps and service options create a clear escalation path from safe homeowner checks to professional diagnostics and repair, helping ensure a newly installed heat pump delivers dependable comfort and efficient operation.
Conclusion
Recognizing the signs of an underperforming heat pump is crucial for maintaining comfort and efficiency in your home. By understanding the common issues and performing simple checks, you can address problems early and potentially save on costly repairs. If you suspect your heat pump is not operating as it should, consider scheduling a professional diagnostic to ensure optimal performance. Explore our expert services today to keep your heating and cooling system running smoothly.
Other Blogs


Flexible Financing Options for Your Needs
Enjoy flexible financing options to make HVAC services and upgrades affordable, ensuring year-round comfort without the financial stress.
Customer Reviews
We recently moved to Florida and needed major repairs to our church. After researching several companies, I went with Sunstate and I’m so thankful I did. Joe came out and provided us with the information necessary to make an informed decision and provided a reasonable estimate. We had a new unit installed, duct work repaired, and new thermostat installed. If you’re reading this review and wondering who to trust for your AC needs, please call Sunstate.

Charlie M.
Great job replacing both the condensing unit and air-handler. Moved the air-handler from the attic to the garage and re-designed and installed new duct work to accommodate the move. Works great and no more worries about overflowing drain pan damaging the ceiling and wood floors. Not to mention making it easier to maintain the AH unit. The guys worked through the night to make sure the AC was back on before they left the job. Thanks for a job well done.
Bob L.
Sunstate mechanical is truly the best contractors I have experienced since I moved into my house 30 years ago. I have been dealing with Joe and his crew for over 11 years now. They are a trustworthy, respectful, experienced crew who works with you and gives you a fair value. They just completed a big job replacing my A/C, gas furnance and condenser. They did an excellent job, no short cuts, made sure everything was functional, and cleaned up the area nicely before they left.
Denise S.
Sunstate Mechanical are absolutely one of the best. I have had two new units installed from them, and the work they did was spectacular. The crew was prompt (even called ahead to confirm the appointment), incredibly professional, and they left the area around the air handler somehow cleaner than when they arrived. I have had no issues with my units over the years because Sunstate Mechanical took the time to do it right the first time.
Cory C.
Sunstate Mechanical Contractors is by far a rare gem in Tampa Bay area when it comes to delivery the best service! They are very responsive very affordable. I have referred them to numerous friends and family who have experienced the same level of service as I have in the past! They only have good things to say about Joe the owner and his team! They also offer a great maintenance plan to keep things running in top shape! Thank you Sunstate! Keep up the great work!
Katrina D.

